How Do I Inspect My Fall Protection Lanyard?
Posted by Howie Scarboro - CEO Fall Protection Distributors, LLC on Feb 23rd 2024
Lanyard Types
Inspecting your lanyard is an important part of ensuring your safety while working at heights. In this blog, we will guide you through the process of inspecting your lanyard to make sure it is in good condition. By following these steps, you can identify any potential issues and take the necessary actions to keep yourself safe.
Falltech does an excellent job explaining the lanyard inspection produces in this training video. Be sure to seek out professional training with regards to how to properly inspect and maintain your gear.
Types of Shock-Absorbing Lanyards
There are two basic types of shock-absorbing lanyards: those with a shock pack and those without. When inspecting your lanyard, it's crucial to be familiar with the type you have. Let's take a closer look at each type:
Lanyards with Shock Pack
If your lanyard has a shock pack, start by checking the stitching on both ends. Ensure that it is not missing or torn. For lanyards with a view pack window, you can inspect the webbing by looking through the sides or opening up the label cover. Check if the webbing inside is torn or misshapen.
Lanyards without Shock Pack
Lanyards without a shock pack, also known as internal lanyards, have the shock-absorbing mechanism built in internally. For these lanyards, the fall indicator warning label is usually found in the folds of the webbing. You need to manually pull the folds apart and check if you can read any words on the label. If you can, it means that the lanyard could have been in a fall and should be removed from service.
Inspecting Web Lanyards
When inspecting web lanyards, there are several things to check for:
Holes, Tears, and Fraying
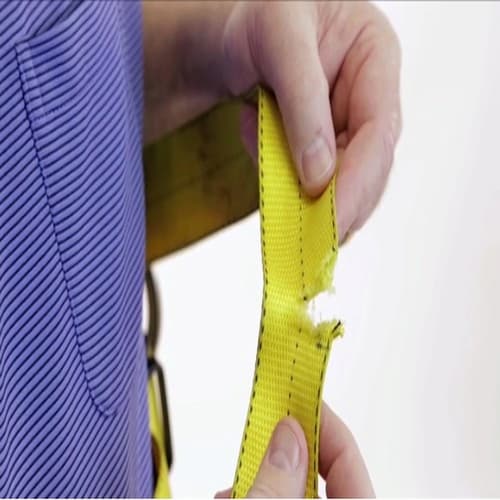
Look for any holes, tears, abrasions, discoloration, or fraying of the webbing. Inspect both sides of the lanyard and visually confirm that there are no holes or tears. If you find any, remove the lanyard from service. Additionally, if there are abrasions, discoloration, or fraying affecting more than 10% of the webbing, it should also be removed from service.

Surface Examination
Bend the webbing to make an inverted U-shape. This will allow you to examine the surface more closely. Check for shiny spots or broken fibers throughout the webbing. Run your hands across it to feel for any hard spots, which could indicate heat stress. Inspect the stitching and ensure there is no loose stitching. Also, make sure the lanyard has a wear patch. If not, it must be removed from service.
Inspecting Rope Lanyards
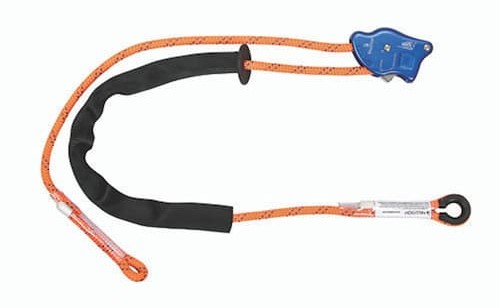
Rope lanyards require a slightly different inspection process. Follow these steps to ensure your rope lanyard is in good condition:

Inspecting the Strands
Grasp the rope with both bare hands and rotate the lanyard, inspecting the strands from end to end. Check for any damage, deterioration, or chemical contact. Look out for fiber cuts, nicks, broken or fuzzy fibers, overall deterioration, UV damage, chemical contact, and any modifications like knots or writing on the rope. If you find any of these issues, the lanyard needs to be removed from service.
Checking Rope Diameter
As you run your hand down the rope, ensure that the diameter is uniform throughout. If there is a variation of more than 5%, the lanyard must be removed from service. Pay attention to weakened areas caused by extreme loads or falls, as they may appear as noticeable changes in the original diameter.
Unraveling and Thimble Inspection
Look for any signs of lanyard unraveling, particularly near the termination point. If the rope is unraveling due to constant turning in the same direction, it needs to be removed from service. Check the thimbles and make sure they are not loose, damaged, or missing. Ensure that splices are secured properly to prevent unraveling. Additionally, inspect the tape and shrink wrap for any signs of tearing.
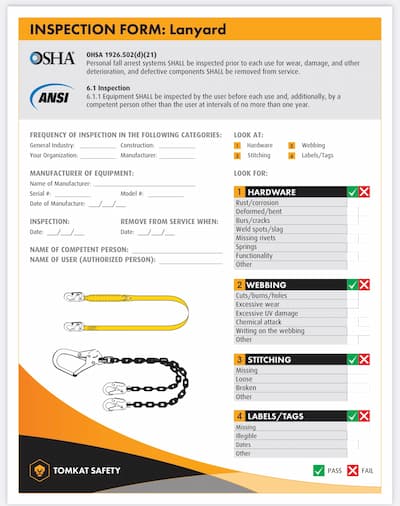
Download our free Lanyard Inspection Form from our Fall Protection Resources Page.

Inspecting Snap Hooks, Rebar Hooks, and Carabiners
The mechanisms on your lanyard, such as double locking snap hooks, rebar hooks, or carabiners, also require inspection. Here are the steps to follow:
Cracks, Bends, and Discoloration
Examine the metal parts of the mechanism and check for any cracks or bends. Discoloration could indicate exposure to chemicals. If you find cracks, bends, or discoloration, the lanyard cannot be used.
Testing the Mechanism
Open and close the mechanism to ensure it functions properly. For snap hooks and rebar hooks, they should close freely by themselves and the nose piece should be flat against the tongue. If the mechanism does not close properly or the nose piece is not flat, remove it from service. Inspect the rivets on the hook and make sure they are securely fastened. For double locking snap hooks, test the locking mechanism to ensure it functions smoothly and springs back into the locking position on its own. For carabiners, open, twist, pull, and let it close by itself to verify proper functionality.
Conclusion
Great job! You've
completed your lanyard inspection successfully. Remember to give the same level
of attention when inspecting your personal fall arrest gear. Check out our other helpful articles to assist
you in maintaining your
harnesses, srl’s, and other fall protection
equipment.
Make sure to check your lanyard and other safety gear to catch any problems early and avoid accidents. If you have any queries or need details feel free to reach out to us at Fall Protection Distributors, LLC, at 863 703 4522 or visit our website www.FallPD.com

