
How to Inspect Fall Protection Equipment
Fall protection equipment protects you only when it is serviceable. OSHA 29 CFR 1926.502 requires inspecting personal fall-arrest systems before each use, and 1910.140 requires an inspection before initial use during each work shift. ANSI Z359.2 adds documented Competent Person inspections at scheduled intervals. This guide walks through the pre-use inspection of every part of the system: labels and records, the full-body harness, the self-retracting lifeline, the lanyard and its connectors, lifelines, and the anchorage.
Most sections pair manufacturer training videos with a written checklist you can use on site today, and every checklist includes a matching free FPD inspection form you can fill in on screen or print.
How Often Fall Protection Equipment Must Be Inspected
| Before each use | The trained user inspects the harness, connecting device, connectors, and anchorage by sight and touch. OSHA 1926.502 (construction) requires it before each use; OSHA 1910.140 (general industry) requires it before initial use during each work shift. |
|---|---|
| Scheduled intervals | A Competent Person performs a documented inspection of every component at the interval set by the manufacturer's instructions, the applicable standards, and the employer's program. ANSI Z359.2 calls for at least once a year. A Competent Person other than the user performs scheduled SRL inspections. Heavy use or harsh conditions call for shorter intervals. |
| After any fall event | Remove the equipment from service immediately, even when no damage is visible. Repair, return to service, and retirement follow the manufacturer's instructions and the employer's program. |
| One does not replace the other | A pre-use check does not replace the scheduled Competent Person inspection, and a current scheduled inspection does not replace the pre-use check. |
Start With Labels and Records
Before you touch the webbing, read the label. Every piece of equipment must carry its required labels in readable condition, including the product identification, capacity, warnings, and use limits. Then confirm the scheduled inspection record is current and that no "do not use" tag is waiting to be resolved.
Do not use equipment with any of these
- Missing or unreadable labels.
- An overdue scheduled inspection.
- An unresolved "do not use" tag.
- Any history of arresting a fall.
How to Inspect a Full-Body Harness
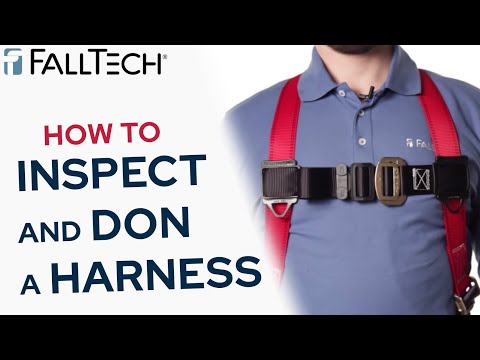
Watch: Harness Inspection and Donning (opens YouTube)
FallTech's harness inspection and donning demonstration.
 Malta Dynamics
 IHSA (Canada)
Start at one shoulder strap and run your hands along the full length of every strap, bending the webbing into an inverted U so cuts, frayed edges, broken fibers, pulled stitching, burns, and chemical damage stand out. Check both sides of the webbing, then move to the hardware: D-rings must be free of cracks, sharp edges, and distortion, and buckles must engage positively or lock without slipping. Examine grommets and tongue buckles for looseness or bent tongues, and confirm every keeper and adjuster holds webbing firmly.
Next, check every impact indicator on the harness, not only the folded and stitched section at the dorsal D-ring. Torn indicator stitching, an exposed warning label, or any other activation sign listed in the manual means the harness has been loaded and must be removed from service. Finish after you put the harness on: keep straps flat and untwisted, secure every buckle, and adjust the fit in accordance with the manufacturer's instructions. Illegible or missing labels also fail the harness, because the Competent Person cannot verify capacity or standards without them.
Key takeaways
- Flex every inch of webbing into an inverted U to expose cuts, frays, or burns.
- Check D-rings, buckles, and adjusters for cracks, distortion, or slippage.
- If any impact indicator is activated or a label is missing, remove the harness from service.
- Repeat the check after donning: no twisted straps, all buckles secure, correct fit.
- Document the inspection; ANSI Z359.2 requires recorded Competent Person inspections.
How to Inspect a Self-Retracting Lifeline (SRL)
 Watch: SRL Inspection (opens YouTube)
FallTech's pre-use inspection sequence for self-retracting devices.
 Malta Dynamics: Cable SRL
 Malta Dynamics: Web SRL
Extend and inspect the full accessible length of the lifeline as the manual directs, then let it retract slowly while you keep control of the line. Never let it free-wheel back into the housing. A cable lifeline fails due to broken wires, kinks, bird-caging, or corrosion; a web or rope lifeline fails from the same cuts, frays, and burns as harness webbing. Contamination such as paint, grease, or concrete can also cause failure. The lifeline must pay out smoothly and retract fully with steady tension. Any hesitation, grinding, or a lifeline that hangs slack means the internal spring or drum needs service.
Give the lifeline a sharp pull to confirm the brake locks immediately, then inspect the housing for cracks, distortion, corrosion, loose fasteners, missing parts, and any sign of tampering. Do not open the housing during a pre-use inspection; internal service belongs to the manufacturer or a service provider the manufacturer has authorized in writing. Check the anchorage handle or eye, the swivel, and the snap hook: the gate must open only with a deliberate two-step action and snap closed under spring pressure. Confirm the load indicator on the hook or lifeline has not deployed, and verify the inspection label is current and legible.
Key takeaways
- Full extension and controlled retraction come first; sluggish retraction fails the device.
- A sharp pull must lock the brake instantly, every time.
- Cable devices fail due to broken wires, kinks, or bird-caging; web devices fail due to cuts and burns.
- Never open the housing, and never let the lifeline snap back uncontrolled.
- Class 2 leading-edge SRLs add an energy absorber and an edge rating to the checklist, so follow the model-specific manual.
Newer devices have model-specific checks. FallTech's FT-R Class 2 walkthrough below shows the added steps for a leading-edge cable SRL, including the external energy absorber.
 Watch: FT-R Class 2 SRL Inspection (opens YouTube)
Model-specific inspection steps for the FT-R Class 2 leading-edge SRL.
How to Inspect a Shock-Absorbing Lanyard
 Watch: Lanyard Inspection (opens YouTube)
FallTech's inspection sequence for energy-absorbing lanyards.
 IHSA (Canada)
Run the lanyard leg through your hands end to end, flexing the webbing or rope to expose cuts, abrasion, burns, and chemical softening. Pay attention to the areas near the connectors, where wear concentrates. Cable lanyards get a different check: look for broken wires, kinks, bird-caging, and corrosion. Then examine every termination, whether it is a sewn loop, a splice, a swage, or a thimble, for damage, loose stitching, or distortion. On twin-leg lanyards, inspect each leg independently, including the stitching where the legs join the energy absorber.
The energy-absorber pack is the critical check. The cover must be intact with no tears, and the absorber must show no sign of deployment: no torn stitching, exposed warning tab, or elongation, depending on the design. Inspect both snap hooks or rebar hooks for cracks, bends, corrosion, sharp edges, and loose or missing parts. Work each gate and lock: it should move smoothly, then close and lock automatically without being forced. As with harnesses, a deployed absorber, an illegible label, or any single failed item removes the lanyard from service.
Key takeaways
- Flex webbing or rope end to end; wear concentrates near the connectors.
- A torn cover, torn stitching, or an exposed warning tab fails the energy absorber, so remove the lanyard from service.
- Hook gates must close and lock automatically and open only with a deliberate two-step action.
- Twin-leg lanyards get a full inspection on each leg, not just the one you use most.
How to Inspect Vertical and Horizontal Lifelines
Inspect lifeline systems in accordance with the system manufacturer's instructions, covering the line itself, the end connections, and any rope grab or traveler that rides on it. On a vertical lifeline, confirm the rope grab matches the rope type and diameter on its label, sits in the correct direction, travels freely, and locks on a sharp downward pull. On a horizontal lifeline, check the end anchorages, the tensioner, and the in-line energy absorber, and confirm the span and number of users stay within the limits in the manual.
Key takeaways
- The system manual is the checklist; inspect each lifeline as a complete system.
- Inspect the full length of the line plus every end connection.
- Rope grabs and travelers must move freely and lock or track as designed.
How to Inspect Anchorages and Connection Points
 Malta Dynamics: Inspection Frequency
Use only the anchorage designated for the task under your employer's fall protection plan. Inspect it for damage, deformation, corrosion, sharp edges, and loose components, then confirm your connector is compatible with the attachment point, properly seated, and fully closed and locked.
A pre-use check confirms condition. It does not establish how much load the anchorage can hold. Engineered anchorage design and capacity calculations require the oversight of a Qualified Person.
Key takeaways
- Tie off only to the anchorage named in the fall protection plan.
- Check for damage, corrosion, sharp edges, and anything loose.
- Ensure connectors are compatible, seated, closed, and locked every time.
- Anchorage capacity is a Qualified Person decision, not a pre-use check.
Free FPD Inspection Forms
Each form below is a one-page PDF you can fill in on screen or print, built for both the pre-use check and the scheduled Competent Person inspection.
Frequently Asked Questions
Replace Retired Equipment
Fall Protection Distributors, LLC provides non-penetrating fall protection anchors, walkboards, and horizontal lifelines for standing seam roofs, along with a complete line of fall protection equipment from the leading brands.
- FallTech fall protection equipment. Harnesses, FT-R and FT-X SRLs, lanyards, and anchors.
- Malta Dynamics fall protection. Harnesses, SRLs, and mobile fall protection systems.
- Full-body safety harnesses. Every brand, style, and size.
- Self-retracting lifelines. Class 1 and Class 2 devices for overhead and foot-level tie-off.